


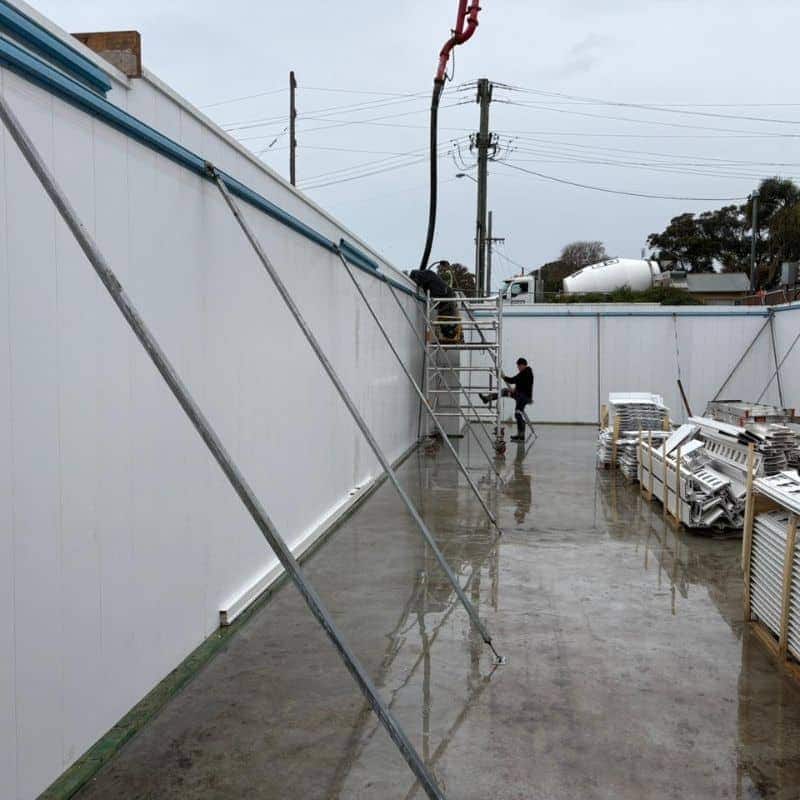
Concrete walls can look solid and still become a water pathway years later. The difference is often decided before the first cubic metre is poured: formwork selection, joint detailing, tie strategy, penetrations planning, and how the pour is executed.
This guide is about wall water-resistant outcomes from an informational perspective. It’s not a product catalogue. The goal is to help designers and site teams reduce grout loss, minimise voids and honeycombing, and avoid the weak points that later show up as damp patches, seepage lines, or “mystery” water ingress—especially in basements, retaining walls, lift cores, plant rooms, and below-ground structures common across Australia.
Why “water resistant” starts with formwork (not just waterproofing products)
The wall’s density and continuity heavily influence water resistance in a concrete wall. When grout (cement paste + fines) leaks out of formwork joints, the concrete at the surface and around edges is more likely to end up:
• porous
• honeycombed
• poorly consolidated
• full of connected voids
Those defects don’t always look dramatic after stripping. But they can become connected capillaries that allow moisture migration under hydrostatic pressure or even persistent wet soil contact.
In other words: if you want a wall to be water resistant, you want a wall that is uniform, well-compacted, and free of leakage-driven defects—and formwork is a key control point.
Quick answer
Good formwork for water-resistant walls is typically:
• stiff enough to hold line and avoid opening joints under pressure
• detailed so joints, corners, and base interfaces don’t leak grout
• planned so ties and penetrations don’t create predictable leak points
• supported by a pour plan that matches the formwork’s capacity (rate, height, vibration)
The main leak paths formwork can create (and how they show up later)
Before getting into material choices, it helps to name the usual culprits. In wall work, the weak points tend to be:
• Base joint (kicker / wall-to-slab interface): gaps, laitance, poor surface prep, or poor sealing where the first lift starts
• Vertical and horizontal formwork joints: panel-to-panel seams that leak grout during placement
• Corners and returns: harder to brace and seal; movement opens micro-gaps
• Tie holes and cones: repeated, regular penetrations through the wall thickness
• Service penetrations and sleeves: poor coordination or late changes cause patchwork sealing
• Construction joints/day joints: if not detailed for water management, they become a predictable seep line
If you’ve ever seen “zebra striping” damp marks at regular spacing, tie holes are often involved. If seepage tracks along a line near a panel seam, joint sealing and stiffness were probably not adequate for the pressure at that point.
Formwork material selection: what matters for water tightness
Material choice doesn’t magically make a wall water resistant, but it does influence how easy it is to achieve (and repeat) tight outcomes.
Formply / timber systems
Pros for water-resistance outcomes:
• easily customised for irregular geometry and penetrations
• straightforward to apply foam strips, tapes, and sealants at joints
• good for smaller-scale site adjustments when details change
Risks to manage:
• Formply edges can damage and swell if not sealed and handled well
• Panels can bow if undersupported, opening joints under pressure
• Inconsistent reuse can create a “patchwork” surface and joint tightness variability
Practical takeaways:
• treat panel edges as critical surfaces—damaged edges tend to leak
• check stud/waler spacing and bracing so panels don’t “work” under pressure
• if your wall is below ground, assume pressure and moisture exposure are more demanding and detail accordingly
Steel/aluminium panel systems
Pros:
• generally more dimensionally stable, repeatable, and stiff
• cleaner joint interfaces when well-maintained
• potentially better for consistency across repetitive pours
Risks:
• Small imperfections at panel junctions can still leak grout
• Complex corners and irregular penetrations can introduce “patches” and temporary seals
• Poor cleaning at joints can prevent full closure and create micro-gaps
Practical takeaways:
• “clean and close” is not a slogan—joint cleanliness is water tightness
• The more modular the wall geometry, the easier consistent water-resistance outcomes become
• always plan corner and return bracing early; corners are where stiffness often fails first
Permanent formwork concepts
In some projects, designers and builders use systems where formwork also becomes part of the finished wall assembly. The key principle remains the same: control the paths that let grout escape and water enter, and design a wall assembly that maintains continuity at joints, corners, and penetrations.
On projects where water management is a core performance requirement (particularly below ground), it can help to understand how assemblies are set up to support that outcome—this overview of water-resistant formwork wall systems provides useful context without changing the practical site checks in this article.
Joint detailing: the difference between “tight” and “watertight”
A joint can look closed and still leak grout when the pour starts, because fresh concrete pressure and vibration will find the smallest pathway.
What makes a joint leak?
Common reasons:
• minor misalignment creates a “wedge gap” along part of the seam
• Bracing is insufficient, so the joint opens under pressure
• debris, hardened paste, or nails prevent full closure
• sealant is applied, but not compatible with wet conditions or movement
• the joint line crosses a change in stiffness (e.g., near a corner, around an opening)
Practical joint strategies that help water-resistant outcomes
Depending on your system, these strategies are commonly used:
• compressible foam strip/gasket at panel seams
• tape systems designed to resist grout bleed at seams
• sealant beads at high-risk seams (corners, base interface, around block-outs)
• tighter tolerances and extra stiffening at joints that sit low in the pour (highest pressure zone)
The “best” method depends on the formwork system, pour height, and wall geometry. The key is that it’s planned, not improvised.
Q&A: Do small formwork gaps really matter?
Yes—small gaps can matter a lot. The cement paste and fines are the first to migrate. When they escape, the remaining aggregate skeleton can’t pack properly at the face, leading to voids and honeycombing. Even if it’s patched cosmetically, that zone can remain more permeable than surrounding concrete, which undermines wall water resistance.
Stiffness and bracing: water tightness is a structural behaviour problem
Many “leaky wall” stories start with a formwork system that was strong enough to avoid collapse, but not stiff enough to maintain tight joints under pressure.
Key factors:
• wall height and pour rate (affects fresh concrete pressure)
• tie spacing and capacity
• waler/stud spacing
• corner reinforcement (corners behave differently from flat panels)
• platform loads and vibration influences during placement
Even a good sealing method can fail if the joint is moving.
Practical check: where you should expect movement first
• near corners and returns
• around openings and block-outs
• at the base of tall walls (higher pressure)
• where tie spacing widens “just a little” to suit a clash
If you’re designing for water resistance, it’s worth treating these as “Category A” areas that get extra stiffness and joint attention.
Form ties and tie holes: the repeat leak point designers forget
Ties are necessary, but tie holes are also a predictable pathway if not handled with a consistent strategy.
Why tie holes can compromise water resistance
• They can create micro-channels if the cones don’t seat properly
• Poor patching can crack or debond with movement or shrinkage
• Repeated holes create a patterned weak point line across the wall face
What to consider at the design and pre-pour stage
• tie type and location (avoid placing ties where water pressure is expected to be highest, if practical)
• cone selection and removal method
• consistent tie-hole treatment method in the spec (not “make good as required”)
• inspection hold points for tie-hole finishing before backfill
If you’re aligning your detailing to support wall water resistance long-term, it’s helpful to think about ties the same way you think about seams and corners—because the performance outcome is cumulative. This is where a consolidated view of water-tight wall formwork details can help frame the conversation between design intent and site execution.
Q&A: Is patching tie holes enough?
It can be—if it’s done consistently and to a known standard. The risk is variability: different crews, different products, rushed finishing, or patching done after the wall has already been exposed to wet conditions. For water-resistant walls, it’s usually better to treat tie holes as part of a defined quality process rather than a cosmetic task.
Penetrations and embeds: coordinate early or pay later
Most walls that “mysteriously” leak have one or more penetrations involved—pipes, conduits, sleeves, anchors, starter bars, embeds, or future openings.
Formwork considerations that support water resistance:
• plan sleeves and block-outs early so seals can be detailed properly
• avoid late drilling or chasing where possible (it introduces uncontrolled pathways)
• ensure penetrations don’t sit directly on a panel seam or corner junction
• detail the interface so the concrete can consolidate around it (avoid congested reinforcement that prevents proper vibration)
The corner-penetration trap
Corners already have higher movement risk and more complex bracing. Adding penetrations close to corners increases the chance that:
• a joint opens under pressure
• sealant or tape can’t be applied continuously
• consolidation is poor due to congestion
If a penetration must be near a corner, treat it as a high-risk detail and build the formwork and pour plan around it.
Pour planning: you can’t “vibrate your way out” of a leaking joint
Even perfect formwork can be undermined by a pour plan that creates excessive pressure or uncontrolled movement.
Key pour controls:
• pour rate: faster placement increases pressure and can force joints open
• lift height management: avoiding uncontrolled free-fall and segregation
• vibration discipline: over-vibration near seams can encourage grout migration; under-vibration leaves voids
• crew coordination: formwork leaks need immediate response—continuing blindly compounds the defect
On-site signs that water resistance is being compromised during the pour
• grout “weeping” from a seam (a red flag that fines are escaping)
• slurry running from the base joint
• visible movement/bulging of panels
• sudden change in concrete appearance at the face after stripping (honeycombing or sand streaks)
If those show up, the best practice response is typically to pause and address the cause—not to keep going and hope patching will solve it later.
Quality checks that designers can specify and builders can actually use
A practical approach is to split checks into three stages.
Pre-pour checks (before concrete arrives)
• panels seated correctly and aligned (no “forced” closure)
• seams sealed per method (foam/tape/sealant) with continuity at corners
• base joint prepared and sealed where required
• tie spacing and tightening verified
• penetrations confirmed against drawings (no last-minute surprises)
• access planned so vibration can be done properly without damaging seals
• contingency materials on hand for minor leakage control (as allowed by the system)
During-pour checks (while pressure is highest)
• Monitor seems low in the pour (highest pressure zone)
• check corners and returns for movement
• if grout loss occurs, identify whether it’s a sealing failure or a stiffness failure
• keep communication tight between the pump operator, placing crew, and formwork supervisor
Post-strip checks (before backfill)
• Inspect tie holes methodically (don’t rely on “it looks fine from here”)
• check seams for honeycombing and pinholes
• assess penetrations and sleeves for continuity
• confirm remedial work is compatible with the wall’s intended exposure conditions
Q&A: How do you know if a wall will be “water-resistant enough”?
A good sign is that the wall surface is uniform, dense, and free of connected defects—especially at seams, tie holes, and penetrations. A warning sign is repeated patching in patterned lines (ties) or along seams, because those indicate a system-level pathway might exist. In below-ground conditions, it’s also important that drainage and external water management are designed properly—water resistance is rarely a single-control solution.
Safety and responsibility: Formwork is also a high-risk temporary structure
While this article focuses on water-resistant wall outcomes, formwork decisions are also safety decisions. Australia’s national guidance on formwork safety (planning, erection, inspection, and control) is worth reviewing as part of any formwork approach, especially for complex wall pours. A good reference point is the Safe Work Australia guide to formwork.
How does this tie back to wall water-resistant outcomes (without competing with your money page)
Think of wall water resistance as a chain:
• formwork tightness + stiffness controls grout loss
• reduced grout loss supports a denser concrete face
• denser concrete face reduces permeability and weak points
• consistent tie and penetration detailing avoids repeated leak paths
• pour discipline prevents defects that become moisture pathways later
If you’re comparing wall assembly options that are designed with this chain in mind, you can explore the background information on a permanent formwork wall solution. The practical guidance above helps you ask better questions and set better site checks—whatever wall system you’re working with.
FAQ
What is watertight formwork?
Watertight formwork is formwork detailed and sealed to prevent grout (cement paste and fines) from leaking through joints, corners, and interfaces during placement. It’s a practical construction goal that supports better surface density and fewer pathways for future moisture migration.
Does steel formwork always produce more water-resistant walls than timber formwork?
Not automatically. Steel systems can be more consistent and stiff, which helps joint closure, but any system can leak if joints are dirty, bracing is insufficient, corners are under-supported, or penetrations are poorly detailed. Water resistance outcomes come from the whole setup, not just the panel material.
What’s the biggest formwork-related cause of honeycombing in walls?
Grout loss at joints and poor consolidation are common contributors. When cement paste escapes, the remaining mix can’t pack tightly at the face, increasing voids and permeability risk—particularly along seams and corners.
How should tie holes be treated for water-resistant walls?
Tie holes should be treated with a consistent method specified in advance (not left to ad hoc “make good”), with inspection before backfill. Variability in patching is a common reason walls develop patterned damp spots later.
Are corners more likely to leak than flat wall sections?
Yes. Corners and returns are harder to brace, more likely to move under pressure, and more difficult to seal continuously—especially when penetrations or openings are nearby.
Can sealant alone make formwork watertight?
Sealant can help, but it can’t compensate for movement. If the formwork is not stiff enough, joints can open under pressure and defeat the seal. Watertight outcomes usually require sealing, stiffness plus a suitable pour plan.
What should designers specify to support water resistance without overcomplicating the job?
Clear expectations for joint treatment, tie-hole strategy, penetration coordination, and inspection hold points. Designers can also identify high-risk zones (below-ground walls, high water tables, corners, construction joints) so the site team allocates attention where it matters.